Mùa xuân – Mùa đẹp nhất (phần cuối)
Chào các bạn
Nếu bạn đã đọc phần 1 của blog này, các bạn cũng đã biết thực sự mình muốn nói về chủ đề gì phải không :)))
Vậy chúng ta cùng vào mục đích chính luôn nhé: Chúng ta sẽ build 1 hệ thống blog đơn giản với 2 API GET (dùng để get tất cả các blog) và POST (dùng để tạo blog mới), và có kết nối tới Mysql
1. Cài đặt Mysql
Để cài đặt Mysql, các bạn cần truy cập vào đây: https://dev.mysql.com/downloads/installer/
Tải về phiên bản phù hợp và cài đặt theo hướng dẫn (đừng quên cài thêm Mysql workbench)
Tiếp theo, ta tạo 1 Database với tên blog_system

2. Tạo Project Spring
Bên cạnh cách tạo project như đã giới thiệu ở phần 1, chúng ta còn có 1 cách tạo như sau
- Truy cập vào: https://start.spring.io/
Ở đây chúng ta có thể tùy chỉnh nhiều tham số khác nhau như loại Project (Maven hay Gradle), Phiên bản Java, …
Trong phạm vi của bài blog này, ta cần lưu ý tới phần Dependencies: Cần có Spring Web, Spring Data JPA, và MySQL Driver
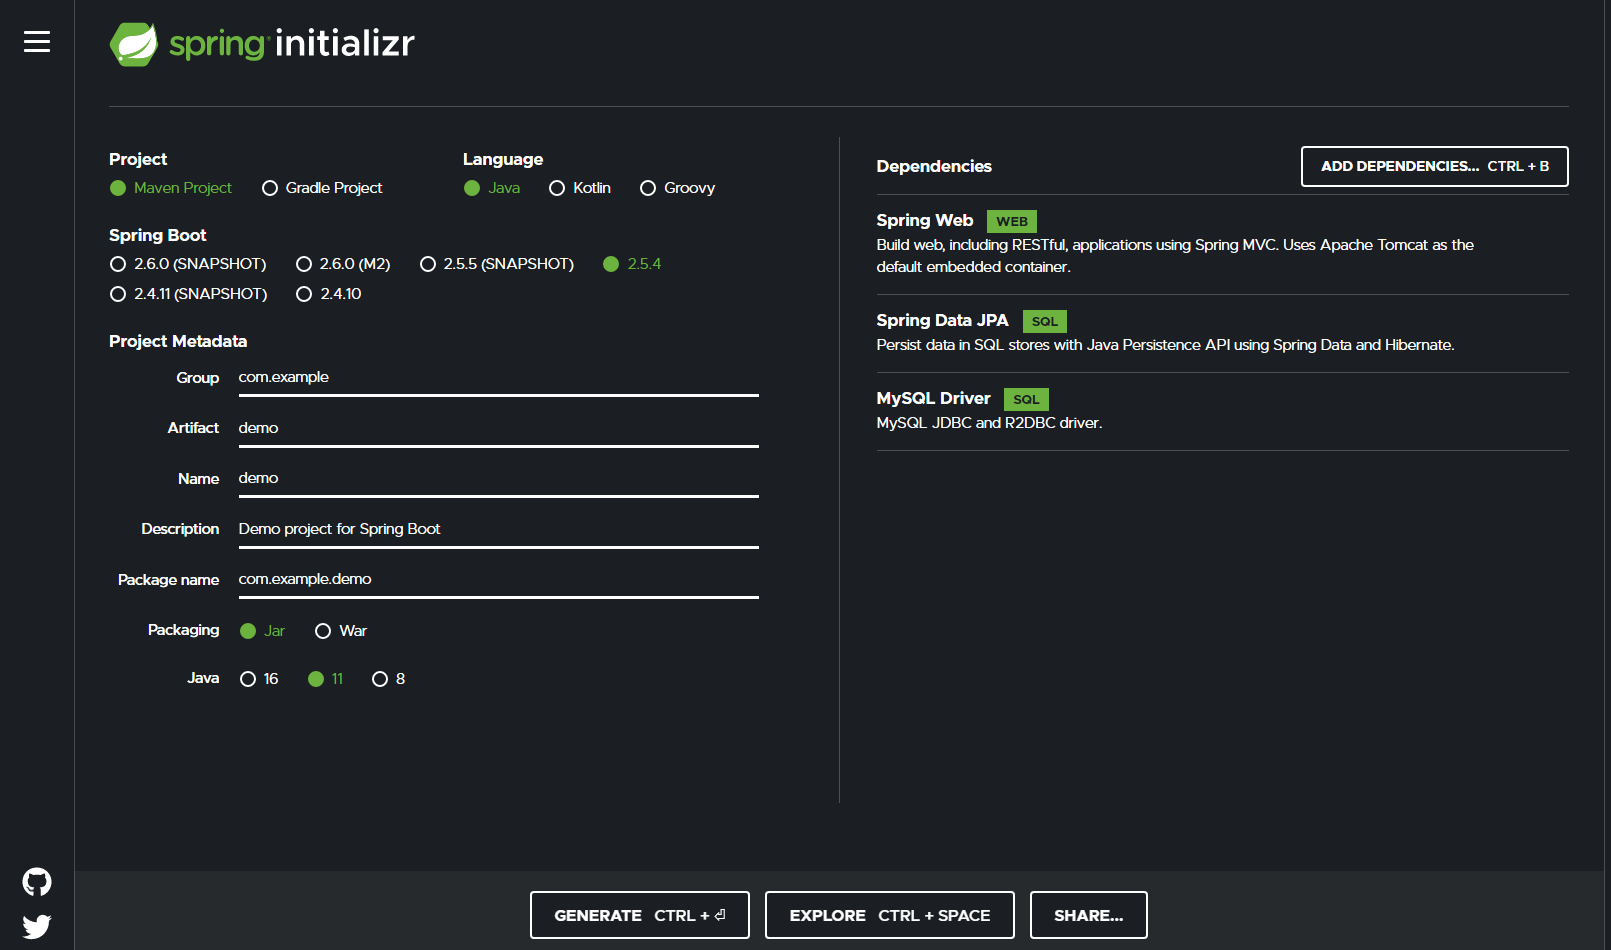
- Chọn Generate
- Sau đó, ta sẽ có 1 file .zip. Ta Import file .zip này vào Spring Tool là xong
3. Viết code
a) Tạo Model
import javax.persistence.Entity;
import javax.persistence.GeneratedValue;
import javax.persistence.GenerationType;
import javax.persistence.Id;

@Entity
public class Blog {

  @Id
  @GeneratedValue(strategy=GenerationType.AUTO)
  private Integer id;
  private String title;
  private String content;
  private String author;

  public String getTitle() {
    return title;
  }
  public void setTitle(String title) {
    this.title = title;
  }
  public String getContent() {
    return content;
  }
  public void setContent(String content) {
    this.content = content;
  }
  public String getAuthor() {
    return author;
  }
  public void setAuthor(String author) {
    this.author = author;
  }
  public Integer getId() {
    return id;
  }
  public void setId(Integer id) {
    this.id = id;
  }

}
Ở đây, ta có sử dụng @Entity để đánh dấu class Blog là 1 model. Ngoài ra, field id có sử dụng 2 tag @Id và @GeneratedValue(strategy=GenerationType.AUTO) để đánh dầu field đó là id, đồng thời id này sẽ được tự sinh ra ở trong DB của chúng ta
b) Tạo Repository
import org.springframework.data.repository.CrudRepository;

public interface BlogRepository extends CrudRepository<Blog, Integer> {

}
Đây là 1 interface có extends CrudRepository. CrudRepository là 1 interface của Spring, sử dụng ORM Framwork Hibernate ở dưới, cung cấp cho chúng ta các hàm CRUD cơ bản với entity ta chỉ định và id có kiểu dữ liệu tương ứng (như ở đây là class Blog và id có kiểu là Interger)
c) Tạo Controller
import org.springframework.beans.factory.annotation.Autowired;
import org.springframework.http.HttpStatus;
import org.springframework.http.ResponseEntity;
import org.springframework.stereotype.Controller;
import org.springframework.web.bind.annotation.GetMapping;
import org.springframework.web.bind.annotation.PostMapping;
import org.springframework.web.bind.annotation.RequestBody;
import org.springframework.web.bind.annotation.RequestMapping;
import org.springframework.web.bind.annotation.ResponseBody;

@Controller
@RequestMapping(path="/blog")
public class BlogController {

  @Autowired
  private BlogRepository blogRepository;

  @PostMapping(path="/add")
  public ResponseEntity addNewBlog (@RequestBody Blog newBlog) {
    blogRepository.save(newBlog);

    return ResponseEntity.ok(HttpStatus.OK);
  }

  @GetMapping(path="/all")
  public @ResponseBody Iterable getAllBlogs() {
    return blogRepository.findAll();
  }
}
Ở đây có 1 số điểm nổi bật ta cần lưu ý như sau:
- 2 method tương ứng với 2 API GET và POST được đánh dấu lần lượt bằng @GetMapping(path=”/all”) và @PostMapping(path=”/add”)
- Với API GET, kết quả trả về là 1 danh sách các entity Blog. Tag @ResponseBody thể hiện rằng kết quả trả về của hàm findAll() cũng sẽ là response cho api /blog/all, đồng thời các entity trên cũng sẽ được Spring tự động convert ra Json
- Với API POST, tag @RequestBody chỉ định việc convert body của request thành đối tượng newPost. Đồng thời, API này cũng trả về response là 200 OK
d) Cập nhật file application.properties
Trong thư mục src/main/resources, ta cần update file application.properties bằng các thông tin để kết nối tới DB
Như đã chia sẻ ở trên: Spring có sử dụng ORM Hibernate nên khi ta set spring.jpa.hibernate.ddl-auto=update, Hibernate sẽ tự tạo bảng trong DB theo cấu trúc entity của chúng ta
spring.jpa.hibernate.ddl-auto=update

spring.datasource.url=jdbc:mysql://${MYSQL_HOST:localhost}:3306/blog_system

spring.datasource.username=root

spring.datasource.password=12345678

spring.datasource.driver-class-name =com.mysql.jdbc.Driver
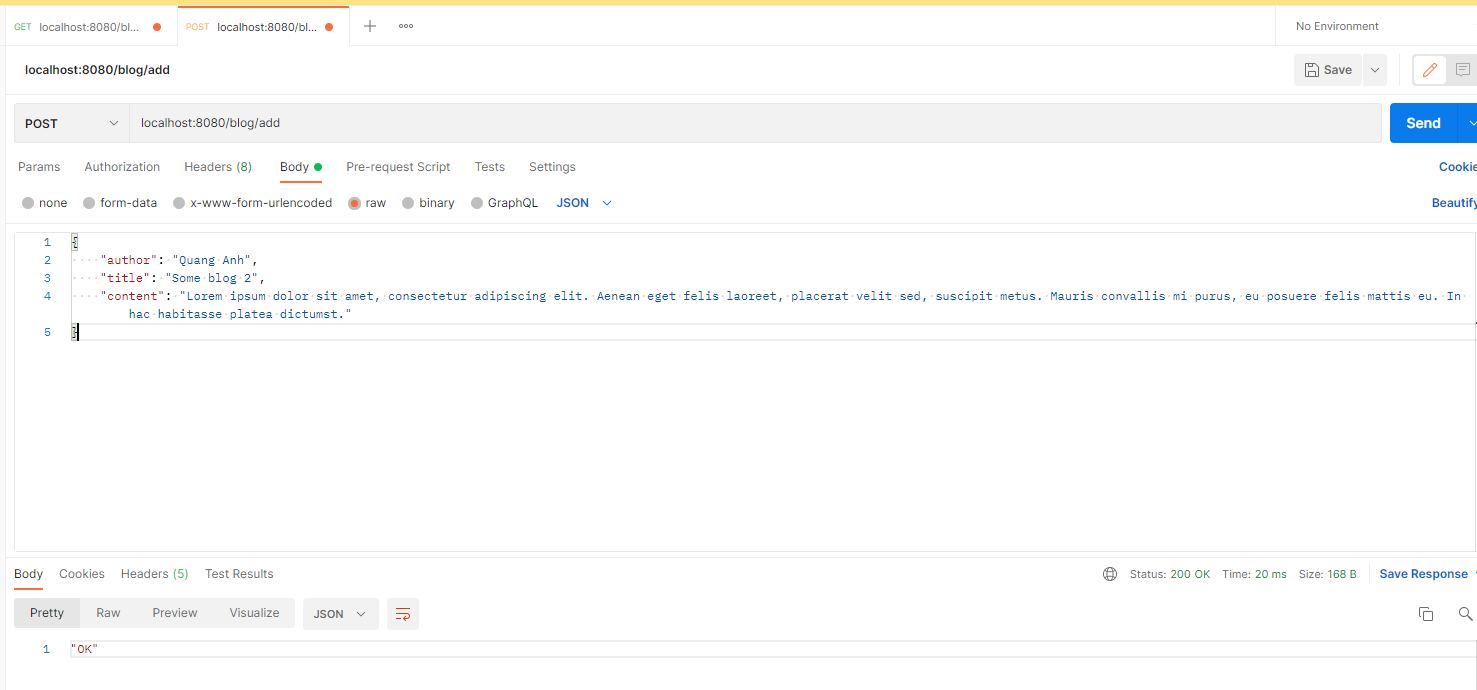
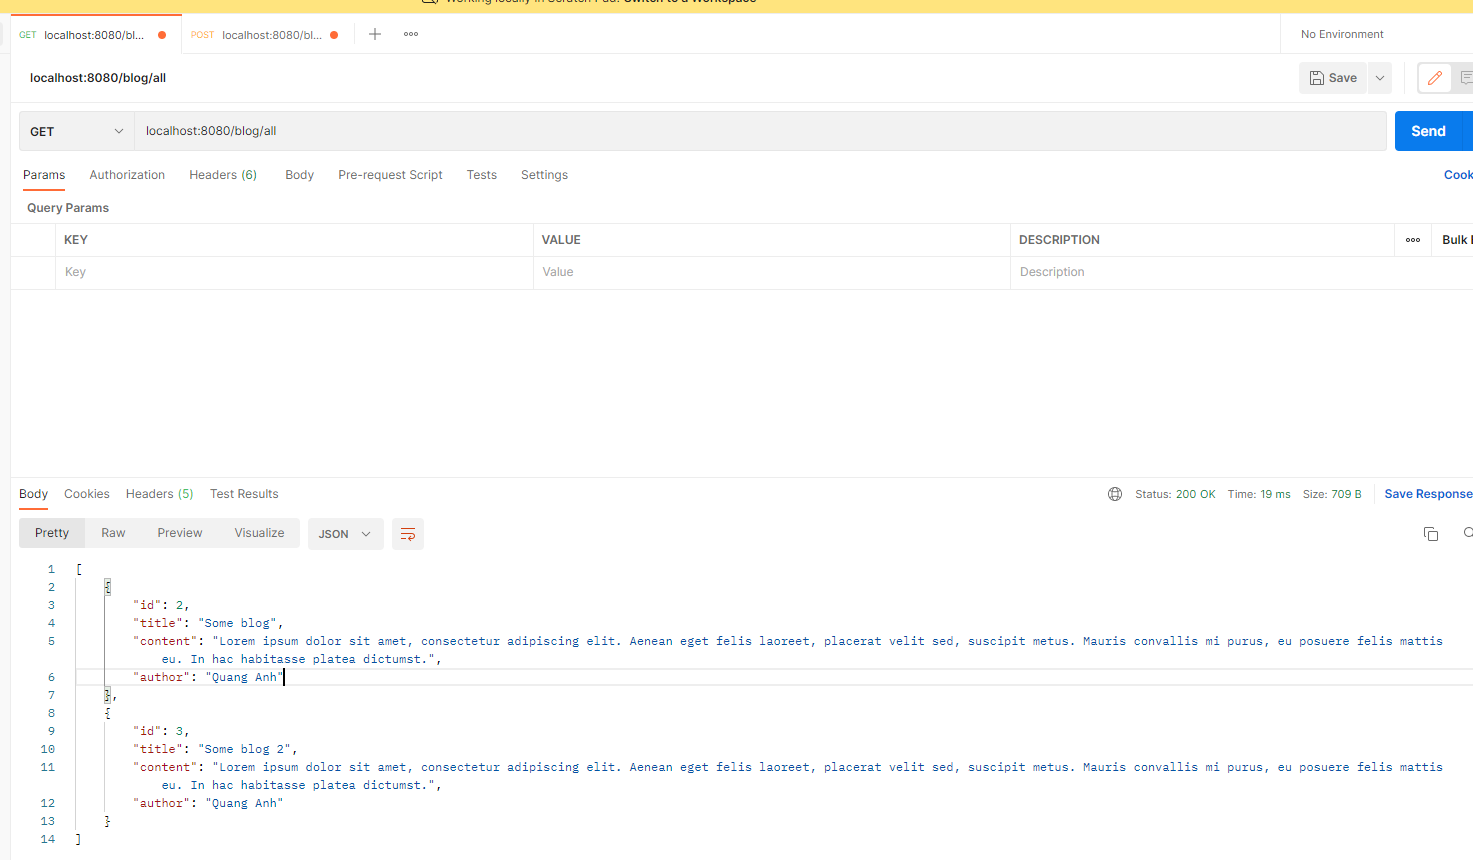
4. Kết quả
Sau khi chạy project, ta gọi API như sau:
Lời kết
Trên đây là phần cuối của blog giới thiệu (rất) cơ bản về Spring Framework. Bản thân Spring còn rất nhiều điều hay ho để chúng ta cùng nhau khám phá. Hẹn gặp lại các bạn trong các blog tiếp theo.
Giới thiệu về Playwright – Automation test

Quẳng Python, Javascript, Java đi – đây mới là ngôn ngữ bạn nên học trong thời gian tới